Making Prattle: A Fully-fledged P2P Video Chat Application Using Python
I’ve been into OpenCV and multimedia processing recently. Some months ago I tried diving into sockets too—made this P2P file sender. So I’ve been thinking, why not make a full-fledged P2P video chat software, combining sockets, OpenCV and sound processing using sounddevice? Could be fun learning experience, and I could write about it as I learn. So that’s how I came up with the idea for this series, of which this is the first post.
To make this series beginner-friendly as well as thorough, I will try to break each tutorial into comprehensive steps, and provide lots of code-samples. You can follow the development of the app here on Github as well, the repo will contain the latest source-code of Prattle.
Before diving into it, we should take some time to understand the different components of the application, and the scopes thereof. The project can be split into the following components.
-
Video
- Recording video from camera.
- Displaying video — received either from the web-cam or through the network.
-
Audio
- Recording audio from microphone.
- Playing audio received through the network.
-
Networking
- Sending live audio and video data over sockets, as they’re being recorded.
- Receiving live audio and video data from the network, and playing them.
Once we’ve figured out and made the individual components, the only step left would be integrating them into a complete, usable app. We have a long way to go, so let’s get started right away!
Displaying live video feed from web-cam
Let’s start by building the video components. We will be using OpenCV for this, the most popular open-source image and video processing library. Installing OpenCV with the correct python bindings may sound trivial, but surprisingly it can get very tricky, as the official way of doing it is compiling it from source! There’s an unofficial python wheel of OpenCV though, so I’d suggest you take that route and avoid all the hassle.
$ pip3 install opencv-python
- Important. When playing with videos in OpenCV, one thing you have to keep in mind is a video is nothing but a stream of images, called frames.
Let’s start with a very simple example. This function opens a small window showing the live feed from your web-cam.
import cv2 as cv


def display():
    cap = cv.VideoCapture(0)

    while True:
        ret, frame = cap.read()
        cv.imshow('Live Web-Cam Feed', frame)

        key = cv.waitKey(1)
        if key in [27, 81, 113]:
            break

    cap.release()
    cv.destroyAllWindows()
Let’s break this code down line-by-line. In the first line, we import the OpenCV library. The library comes with the name cv2, but we’re importing it with the name cv for convenience.
Then we start writing the code of the function display. Displaying a video involves a few steps. Firstly, to read frames from a video source, we need to create a VideoCapture object. The argument to the constructor indicates which camera you want to use, in case you have multiple web-cams, for most people this argument will be 0. So, we create a VideoCapture object like this,
cap = cv.VideoCapture(0)
Now, remember that a video is nothing but a stream of frames, i.e. images. So naturally, displaying a video involves
- Extracting the individual frames of the video.
- Showing the frames one by one.
Crucial for this part are two functions, the read function of the capture object, and the cv.imshow function from the OpenCV library.
As evident from the name, the read function of a VideoCapture object gives us a frame of the video stream. In case of a web-cam feed, it returns the frame captured from the webcam at the moment the function is called. And then by passing this frame to cv.imshow function, we display it on our screen! So the no-frills code for this part would be —
while True:
    ret, frame = cap.read()
    cv.imshow('Live Web-Cam Feed', frame)
Here as you can see, the cap.read function returns something else along with the frame, which I’m putting into the ret variable. It’s a boolean value, indicating whether the read operation was succesfull or not. Also, the cv.imshow function takes the title of the window to be shown as its first argument, and the image to be shown as its second argument.
We have put the two lines inside a while loop as we want to repeat these steps in rapid succession, resulting in a continuous video stream.
A hint for the upcoming content, the first step in this loop—extracting a frame from a video stream—can be replaced by any other method, such as receiving it over the network. All the
cv.imshowfunction cares about is getting the frame, however you can manage to get it. We are going to utilize this when we send and receive video over the network.
Now you may be getting curious about this part of the code —
while True:
    ...
    key = cv.waitKey(1)
    if key in [27, 81, 113]:
        break
This is an important part as it would let us get out of the while loop, and thus, exit the program gracefully. The cv.waitKey function waites for a key press event, and returns the ASCII value of the key pressed. Then we check if that corresponds to any of the keys — q, Q or ESC. If it is, we break out of the loop.
The final lines of the code does the clean-up work.
cap.release()
cv.destroyAllWindows()
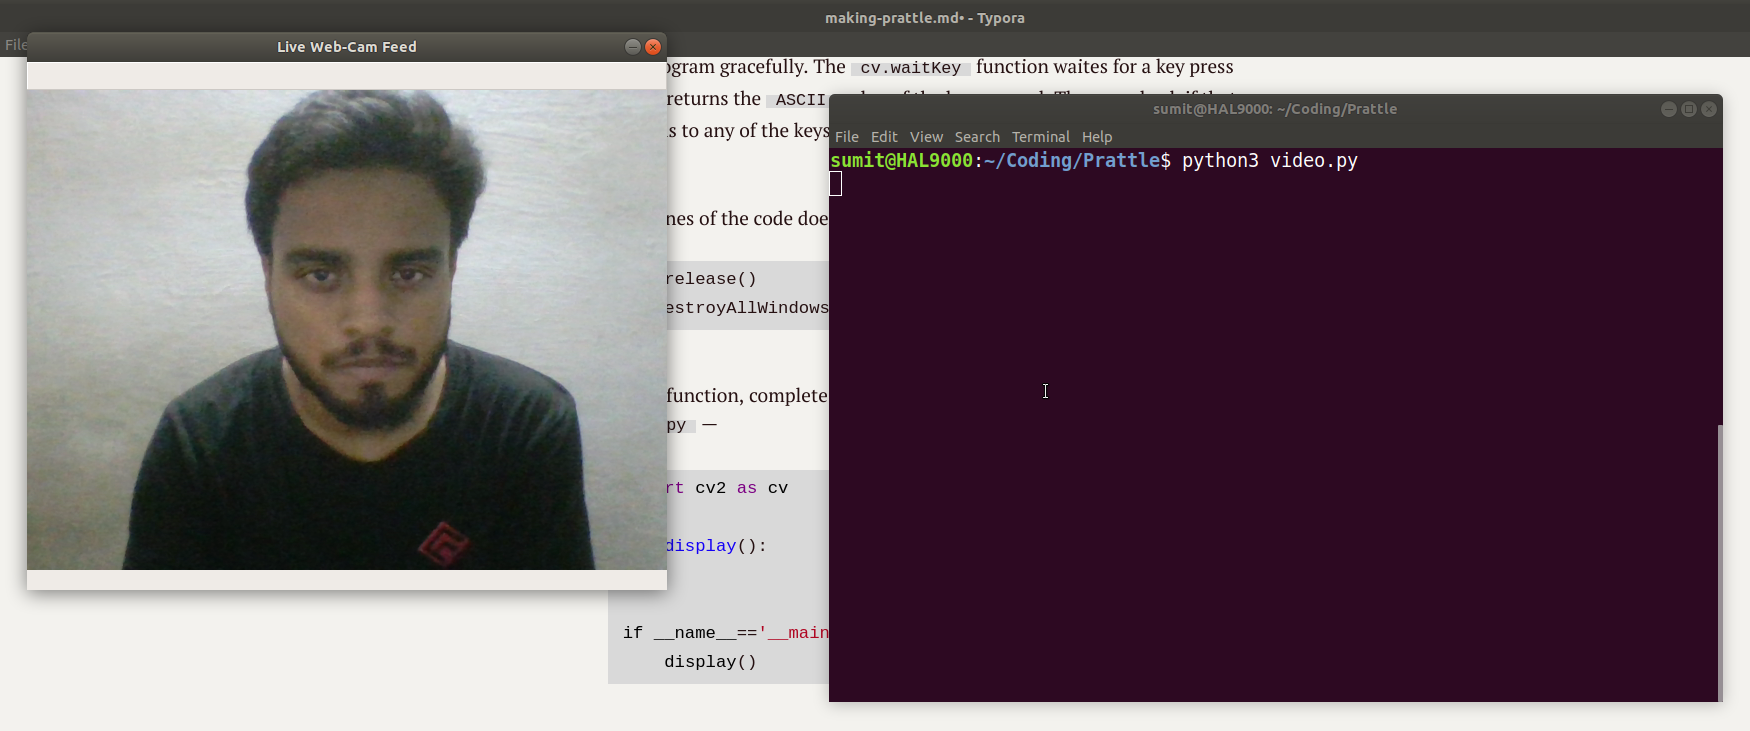
To run the function, complete the script by adding the last two lines, and save it as video.py —
import cv2 as cv

def display():
...

if __name__=='__main__':
	display()
And then on running it, you’ll see a window showing video-feed from your webcam, which you can close by pressing Q or ESC.
$ python3 display.py
Conclusion
I won’t delve much deeper in this post, I’d like some feedback from the readers on the format and content of it before I start writing the rest of the series extensively. So please leave your feedback, and any questions if you have, down below in the comments, or in this Reddit thread. Cheers!